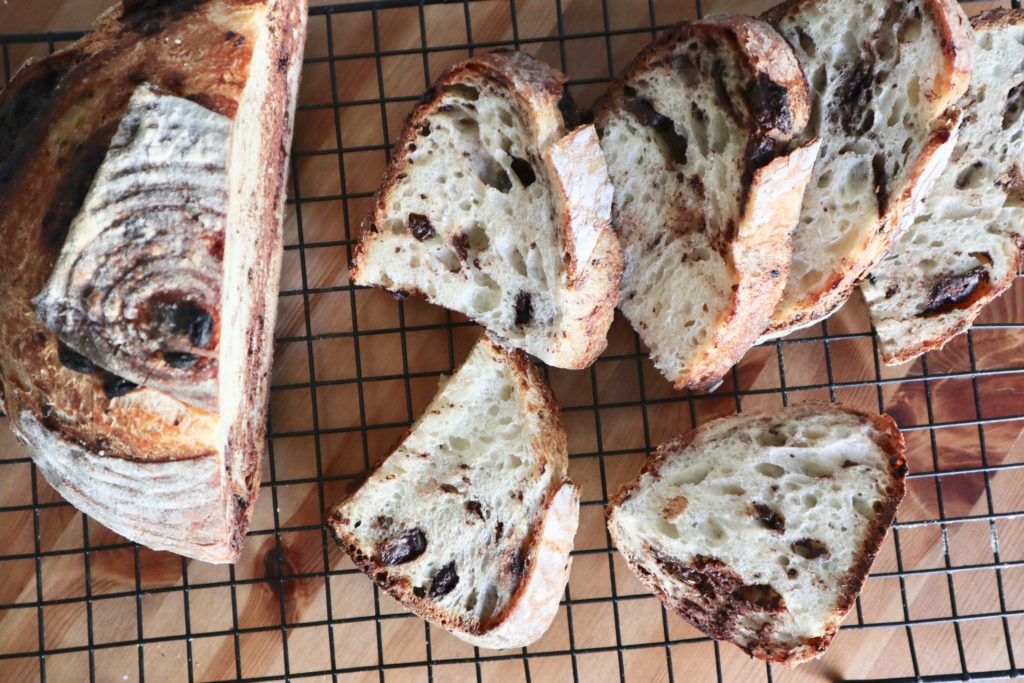
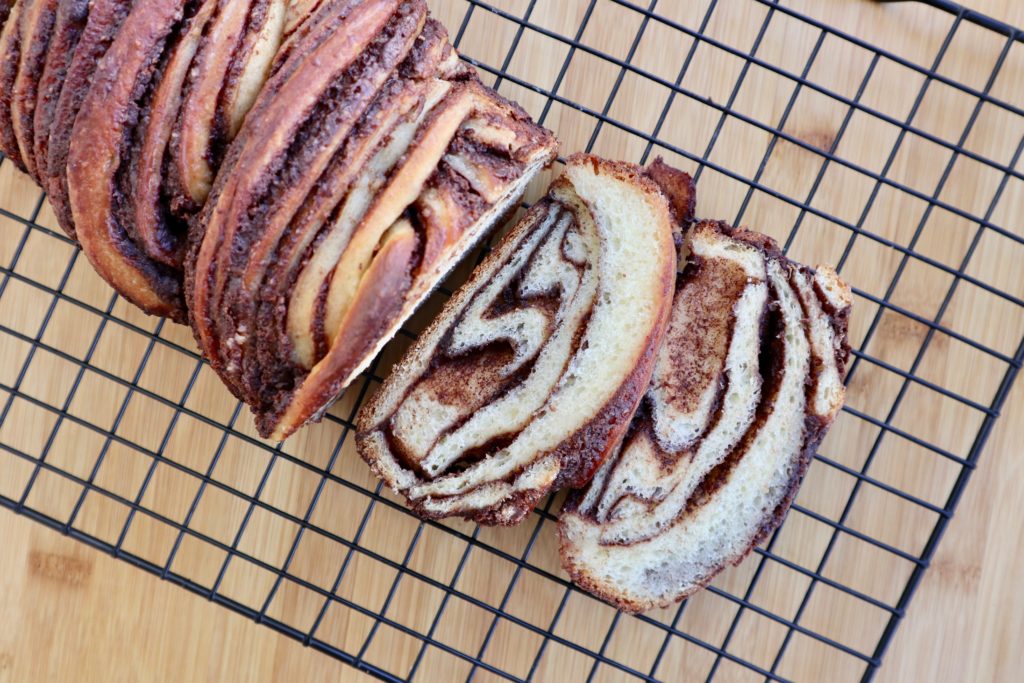
dark chocolate boule
The whole word is baking. Flour is selling out at a record pace, my brother-in-law’s parents just bought a pound of yeast on eBay, and banana bread is having a MOMENT. Luckily, I’ve been baking for comfort (my own and others) for years and the training is paying off.
Since the social distancing has been in effect I’ve made marbled banana bread, lemon loaf cake, speckled easter cookies, ice cream cake, carrot cake, a gluten free chocolate loaf, and this dark chocolate boule.

After starting down the sourdough journey a few years ago, I’ve become obsessed with the process.
I love the whole resting, folding, rising, and shaping odyssey. I love planning my weekend around half hour windows of time and I really love eating warm bread with butter, maldon sea salt, and honey – no explanation needed.
The process however, is not so obsessed with me. I’ve tended inactive starters longer than a healthy relationship should allow and sliced into SEVERAL dense bricks of bread.

All that is to say that in a time when grocery shopping is terrifying and we are all walking around with a shared sense of anticipatory anxiety and grief – I just don’t think it’s the time to venture into sourdough territory for the first time. Undoubtedly an unpopular opinion given how trendy it has become during this pandemic, but I’d really rather see people eating bread than panicking over the activity level of their new pet jar of flour and water.
I’ve been there. Now is not the time.
So while I originally made this loaf the old fashioned blood, sweat, and tears sourdough way, with spice offers this truly beautiful alternative to sourdough, turning everything on it’s head by adding chocolate chunks and making the world a better place.
This bread is pandemic anxiety baking perfection.
It still takes a lot of steps (which many a friend pointed out after I directed them to the recipe) but it’s actually like great training wheels for the sourdough process – with a much lower risk of brick bread and much higher pay off of chocolate.
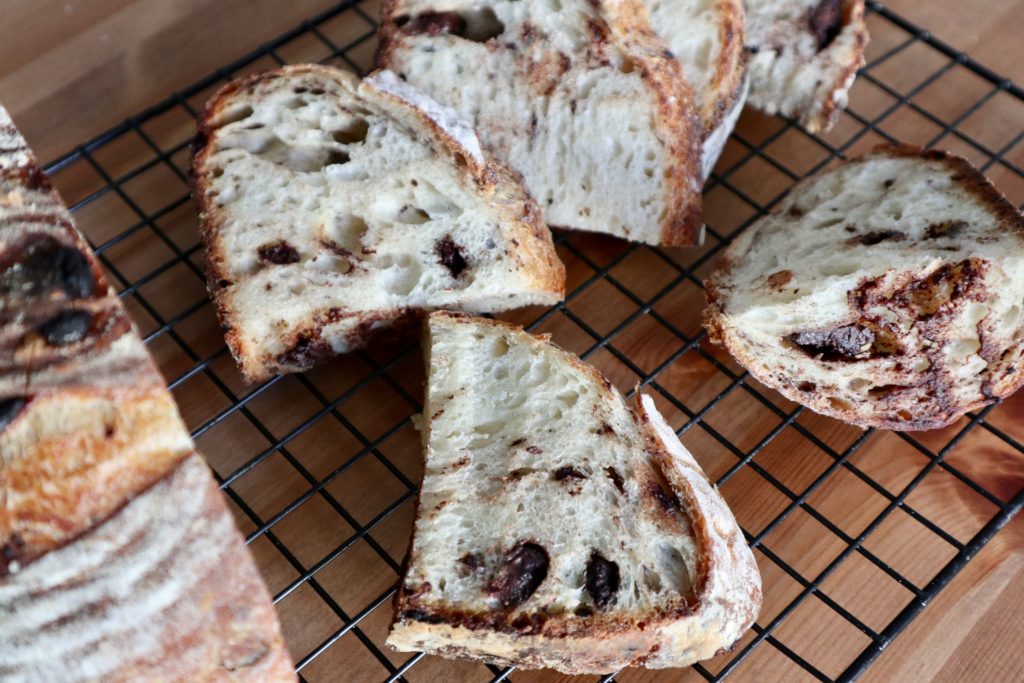
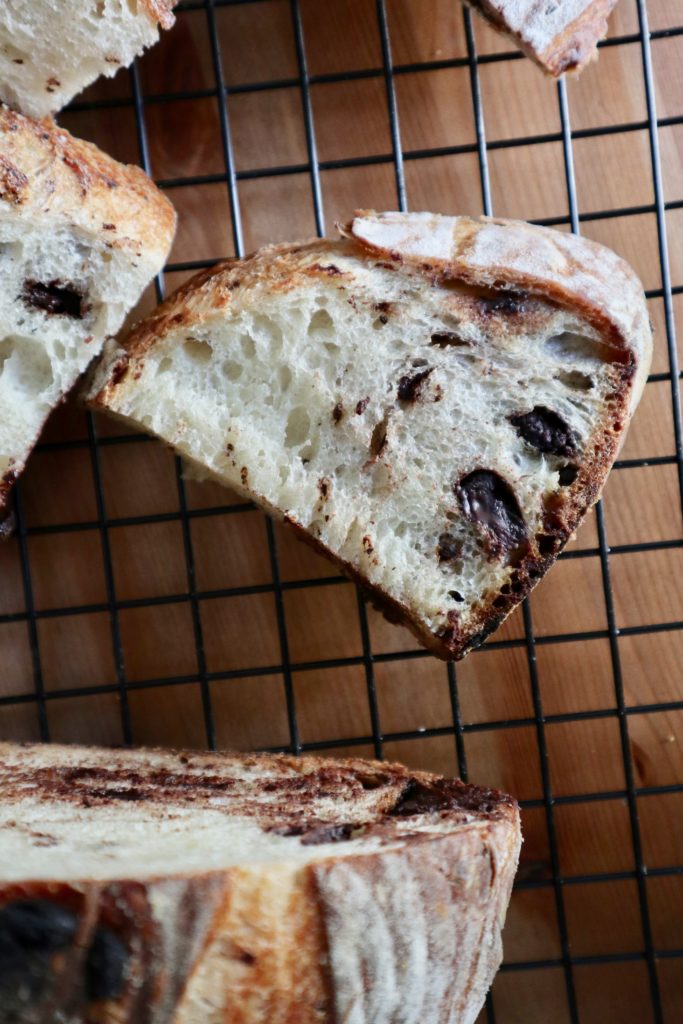
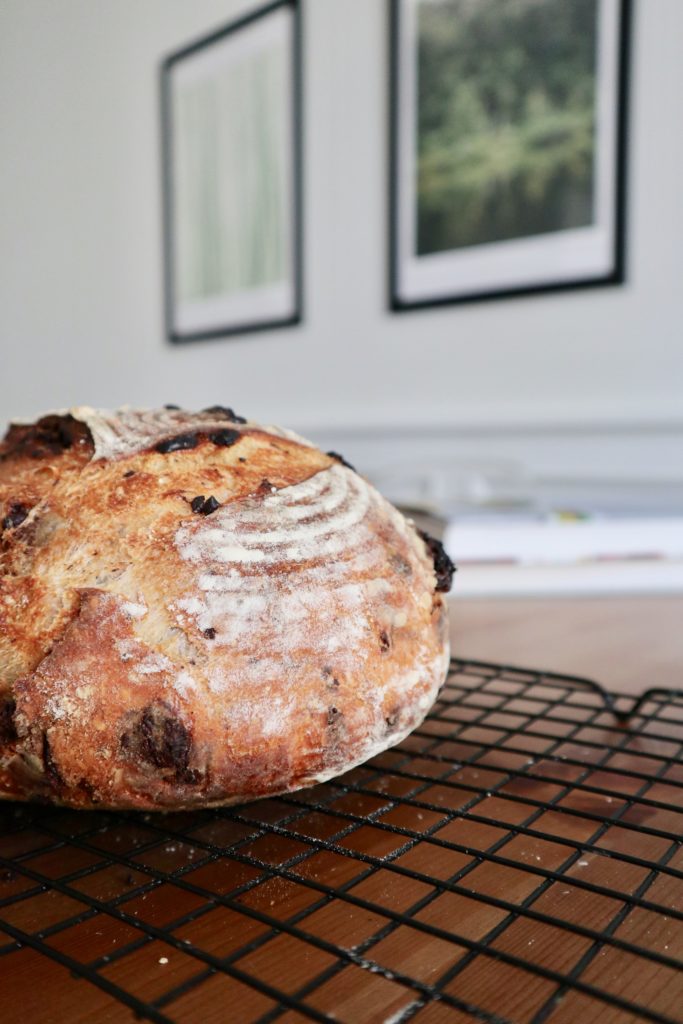
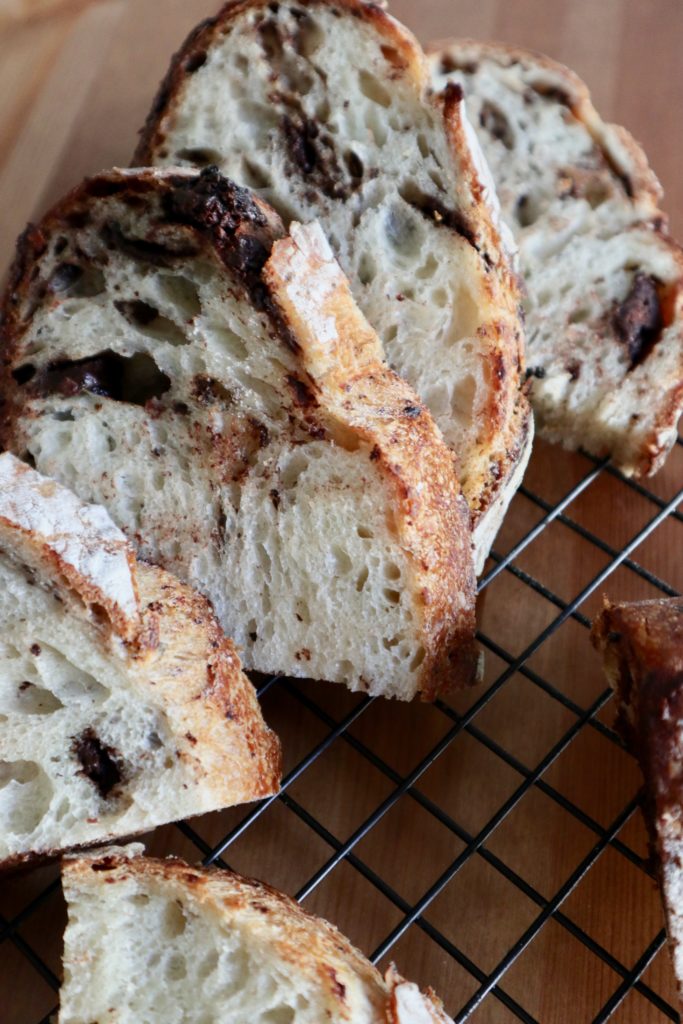
This loaf of comfort has a darkly toasty crust, chewy interior, with bitter and sweet chocolate chunks. I won’t stop talking about it or trying to describe it to people who have not asked me to describe it. Once cooled it’s like a floury baguette meets chocolate chip cookie and who couldn’t get down with that.
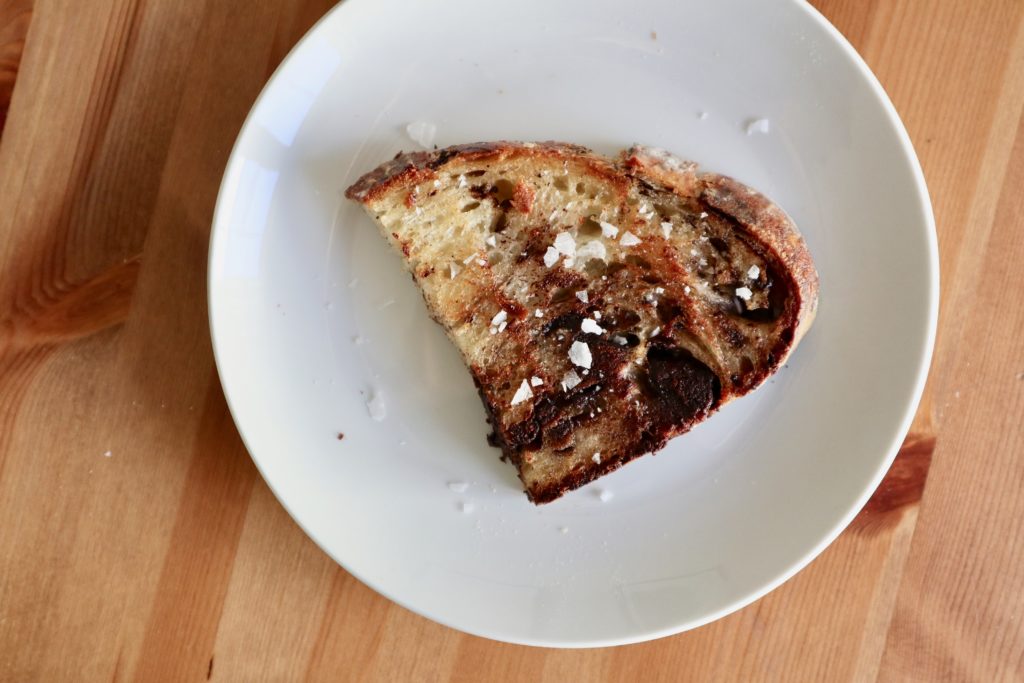
I also grilled a few slices in a pan of butter and sprinkled them with sea salt in case anyone is keeping track.
I’m sorry this post has been so long. You can finish reading it while you embark on the 24 hour journey of making this bread. I can promise at least one of those tasks will not end in regret.
dark chocolate boule
(recipe by with spice)
biga (your sorta like a sourdough starter, starter)
3 cups and 2 tablespoons (400 g) all-purpose flour
1 cup and 2 tablespoons and 2 teaspoons (272 g) warm water
1/8 teaspoon (0.5 g) instant dried yeast (we can make non instant yeast work here too)
dough
3/4 cup and 1 1/2 teaspoons (100 g) all- purpose flour
1/4 cup and 3 tablespoons (103 g) warm water
2 teaspoons (11 g) kosher salt
1/4 teaspoon (1 g) instant dried yeast (or 1/2 teaspoon non instant yeast)
all of the biga (from above)
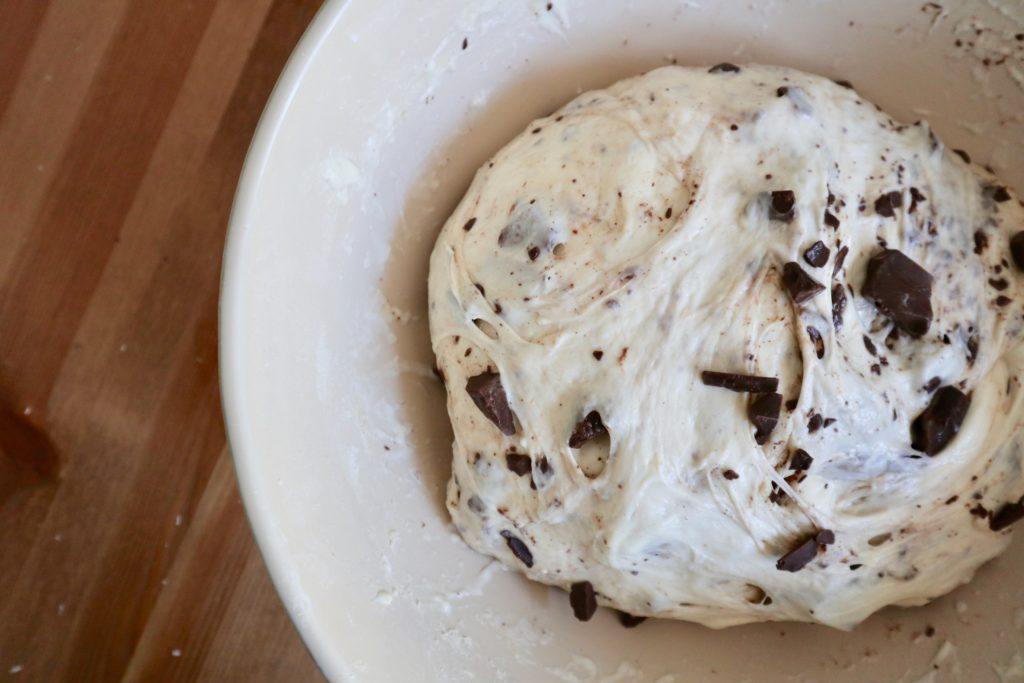
1 cup (170 g) chocolate chunks (I chopped up part of trader joe’s dark chocolate 1lb bar)
directions
biga
The night before you plan to make and eat the bread, whisk together the flour and yeast in a large bowl. Stir in the warm water with a spoon until it forms a shaggy dough, using your hands to knead it together for 1-2 minutes more.
Cover the dough with plastic wrap and leave at room temperature on the counter for 12-14 hours. By the end of this time it should have tripled in volume and show cute little bubbles all over indicating the fermentation process.
dough
In the morning, whisk together flour, salt and yeast in a large bowl. Pour in the water and stir together with a spoon until just incorporated.
Add the fermented biga by hand, squeezing and pinching the two doughs together. Fold the dough over itself a few times to incorporate. If it’s feeling really sticky, wet your hands if needed. Work the dough until it has come together fully. Cover the bowl, and let rise for 20 minutes. It should relax out a bit during this time.
Now is when we get into the folding process. Sprinkle the chocolate chunks over the surface of the dough and begin your first fold by using wet hands to reach under the dough and pull a quarter of it up before folding over the top of the dough. Rotate the bowl 45 degrees and repeat until you’ve folded four corners over the chocolate and the dough resembles a ball.
Invert the dough ball so the seams you just created with folding are now on the bottom and the top of the dough is smooth. Cover the bowl and let rise another 20 minutes so the dough can relax again. (Looking back, I actually may try not inverting it and seeing if this keeps the chunks more inside – will report back.)
Repeat the folding two more times, allowing the dough to rest 20-30 minutes in between. Some of the chocolate kind of burst through the dough at this point and I panicked but it was ok, so you shouldn’t panic either.
After the last fold, let the dough rise for 1 1/2 hours more or about 3 hours since you initially mixed the dough and biga together.
Once your dough has tripled in volume, place a dutch oven with the lid on inside your oven and preheat your oven to 475 degrees.
Dust a proofing basket – or bowl lined with a dishtowel – with flour, and set aside. Lightly flour your work surface and gently lift the dough from the bowl, careful not to tear it in places it may be sticking (use more flour as needed).
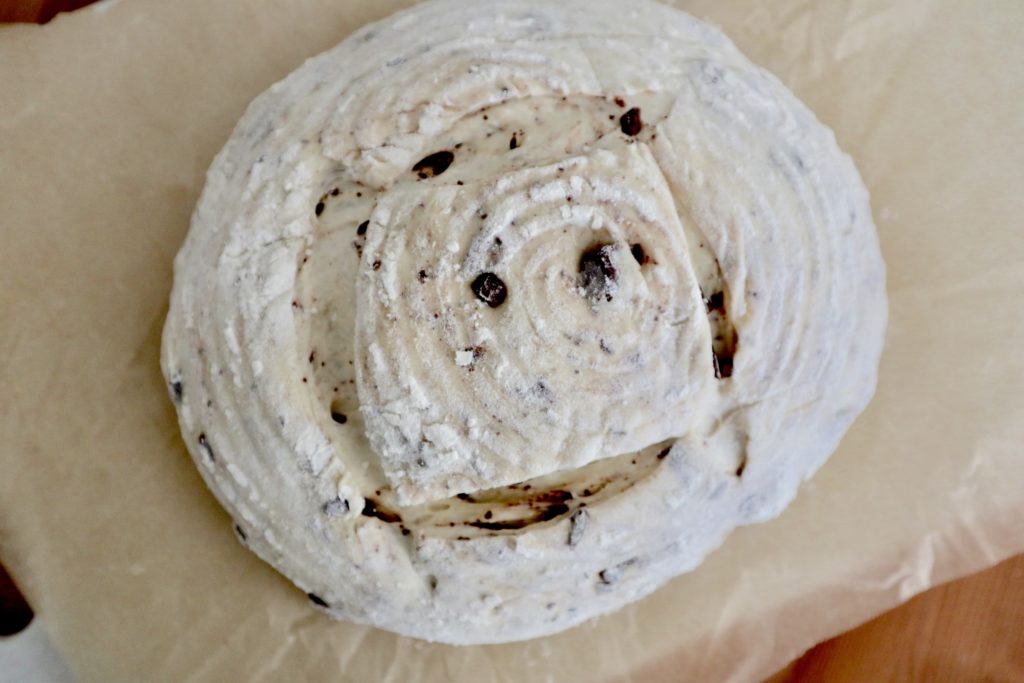
Shape your dough by folding the four corners one last time until it is in a ball shape. Flip the dough over so the seam is on your counter.
On a counter spot with no flour, cup the dough ball gently with both hands and drag it towards you a few times, rotating it a few degrees clockwise every few drags. This should create some surface tension and tighten the dough ball. It’s a very easy technique to find on google if this is making no sense.
Place the shaped loaf in the proofing basket or bowl, seam side down. Lightly flour the top and cover the dough to let it proof for about 1 hour more, or until it passes the finger dent test (when an indentation in the dough slowly and incompletely springs back).
After the final proof, scoop the dough onto a piece of parchment paper seam side down and score the top in a square shape. Transfer carefully to your dutch oven and place the lid back on (obviously using oven mitts throughout this process…)
Bake covered for 30 minutes and then remove the lid and bake roughly another 20 minutes. This was a quick second half of the bake for mine so keep an eye on it. You want the bread to have a deep brown color all over.
Remove the dutch oven and carefully transfer your loaf to a cooling rack for at least 20 minutes. It’s magical when warm, of course, but the chocolate will still be melted and it will streak all over the rest of the bread when you slice it. So if you want cleaner cuts, wait until the bread has fulled cooled before slicing.
Store cut side down in a paper bag if you’re going to enjoy it with in a day, or slice it up and store it in the freezer to toast or griddle in butter as you please.
Enjoy.


Leave a Reply